New feature: ‘Tests’ module
We developed a new feature which allows you to create tests, send them to candidates via email, and track results. The idea came to us from our users in Avon company.
There are 2 tabs: “Create new test” and “My tests”.
‘Create new test’
A page to build new tests. Using this page you can:
1. Specify the test title. Please try to choose a title that describes the test and fully understandable for candidates.
2. Add a short description. Describe in few words the purpose of testing, features, details, and everything that candidates should know about the test.
3. Enter the question title. You should be brief and exclude ambiguity, so candidates can accurately understand the question.
4. Define the question type:
> Tests: one/multiple correct answer(s) from the number of given options;
> Text answer: an answer written by candidates themselves.
5. Select the number of points given for the correct answers. It is disabled for “text” answers, because they are subjectively evaluated.
6. Set a time limit for passing the test. Choose the time needed for candidates to finish the test. If the candidate has failed to finish the test till the deadline, the test will be completed and the results will be saved automatically.
Once you save the new test, it appears at “My tests” tab.
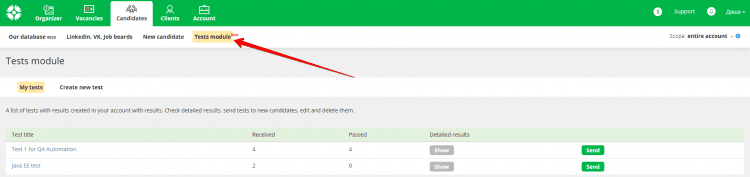
‘My tests’
You will find here a list of all tests created in your account. Here you can view detailed test results, send tests to new candidates, edit and delete existing tests.
Click the “Show” button to open the detailed results for each candidate.
You can delete and edit tests via appropriate icons, which appear when you hover over the test line.
Click «Send» to send a test to the candidates you’ve chosen. Once you’ve done this, you can select needed candidates entering their names in the search line. Click on the candidate to add him to a list below.
Candidates without emails in their profiles will be unable to receive test links.
Use menu on the right to edit the email subject line and title.
ClickC the «Send» button to email candidates with the link to the test page so they could start the test. You can remove candidates from the list, and change the candidate’s email here.
Test passing and scoring logic
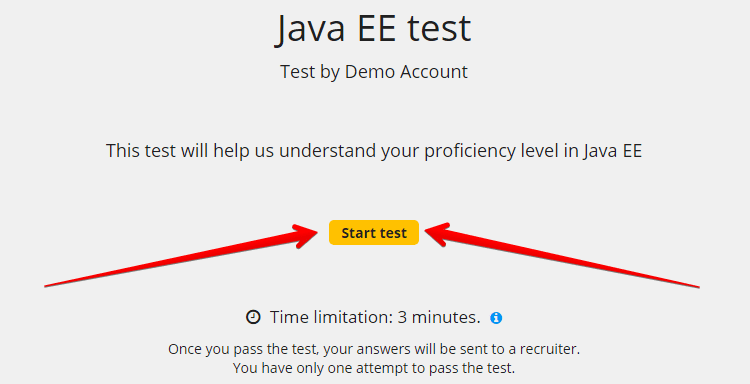
Once a candidate received the email, he can go to a separate test page via the link you have sent. There will be the title and the description you have written + a few details to describe the test.
Once the candidate clicks on the «Start test» button, the timer is turned on and the first question appears.
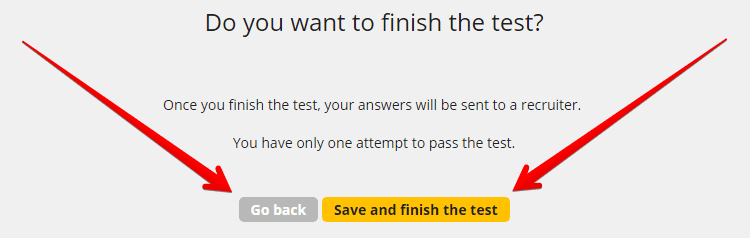
 If the candidate finished the test before the time limit, he can choose “Go back” or “Save and finish the test.”
 If time expired before a candidate answered all the questions, the test will be finished automatically; all completed answers will be saved.
Points will be assigned only for 100% correct answer. This means that the correct answer is counted, for example, as 3 of 3 right answers from 5 options (not 2 of 3, etc.).
Once a candidate completes the test, the user who sent the test receives a notification letter with a link to the test results. Also, you can see results at the “Test results” block in a candidate profile.
We will keep on working with this feature to improve its UX and add some extra functions (percentiles, etc.)