7 steps to get to know CleverStaff
Dear friends, we offer you a concentrated guide to working in CleverStaff. It is useful not only for beginners, but also for those who want to do everything as systematically as possible. Moreover, over the past six months, our developers have implemented many effective features. Who knows, maybe one of them will revolutionize your time management or routine tasks? So let’s “step” together – from the very beginning.
STEP 1. See who is who in the account
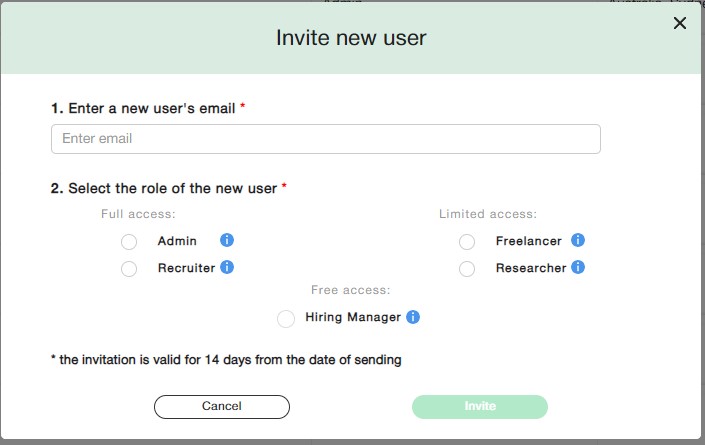
The main thing here is to determine who plays what role. There are 5 roles in total. Administrator and Recruiter are roles with full access, Freelancer and Researcher – with partial access, and Hiring Manager – with limited but free access ☺. This is to make the team feel comfortable working together with vacancies and candidates. That is, everyone is “on their own field”, but they share the “harvest”.
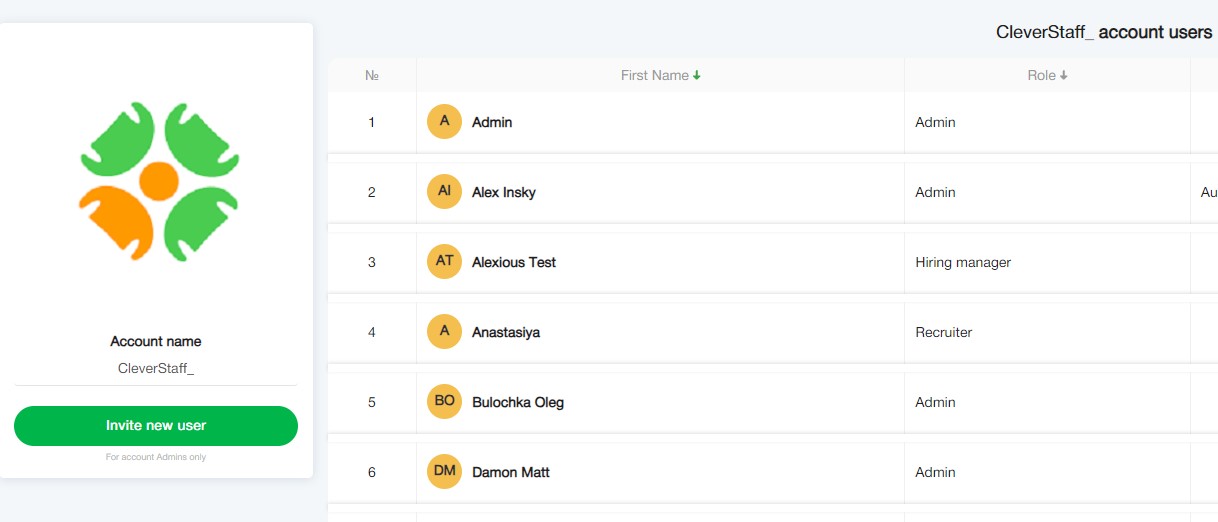
Everyone has their own rights and powers, but only the Administrator has an absolute power. He or she manages everyone and everything that happens in the account: sends invitations, assigns or changes roles, and, for good measure, can even delete someone if they do something wrong ☺
In the Settings section, the Administrator specifies everything that other users use in the main sections of the system, including tags for marking candidates, sources for tracking them, scorecards, etc.
By the way, this year, a new section has been added to the account’s Settings – Email Templates, which greatly facilitates communication with candidates at different stages. And yes – access to templates and the ability to edit them is provided to recruiters by the Administrator.
It should be pointed out that CleverStaff works in accordance with the GDPR (the data protection regulation within the framework of the EU and the European Economic Area) – in an extended adaptation: in the Settings you can apply auto-sending of a GDPR request when adding a candidate to the database, set reminders if a response to the request is not received from the candidate, display a list of these candidates, etc.
STEP 2. Invite the client to the system
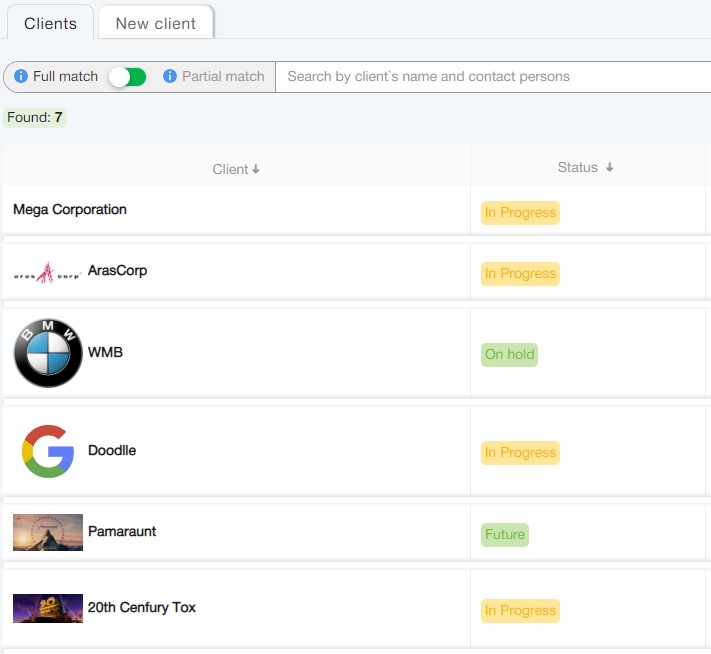
Clients are the ones for whom candidates are searched. It is important to enter information about them into the system, especially when there are a lot of them, so that you do not lose anyone or anything. By creating a customer profile, you will organize the information related to them.
Another interesting thing is that the Admin can invite a customer to the role of a Hiring Manager. They can be added without any limit in number and conveniently cooperate in a team. In this role, customers will see how things are going with their vacancies (and only this, no other and no others) in real time, and not disturb the recruiter once again.
STEP 3. Save time on vacancies
Go to the Vacancies section. Creating them is intuitively simple: select the New Vacancy tab, choose the IT or non-IT option. They are almost identical, but for the IT sector, the system allows you to select certain options that make it much easier to work with IT stacks. Next is the name, customer, and other fields.
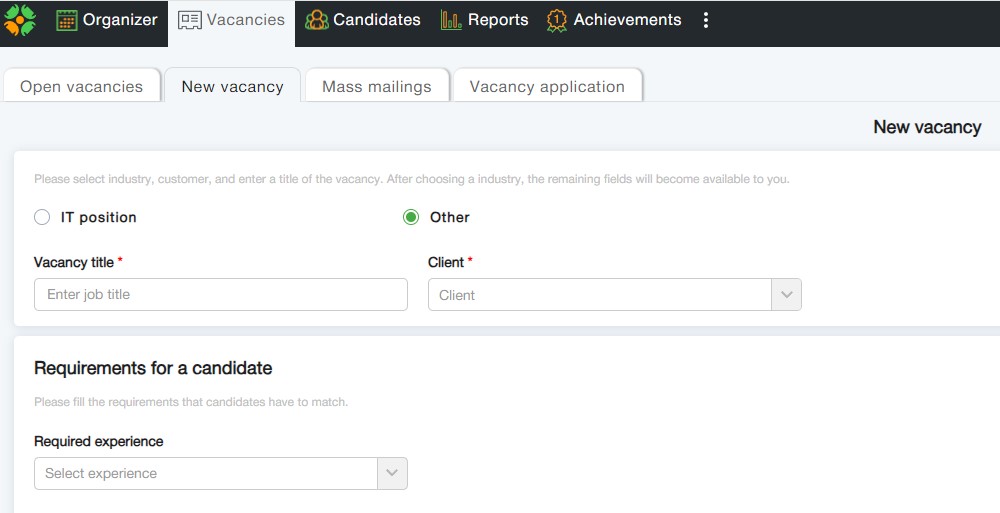
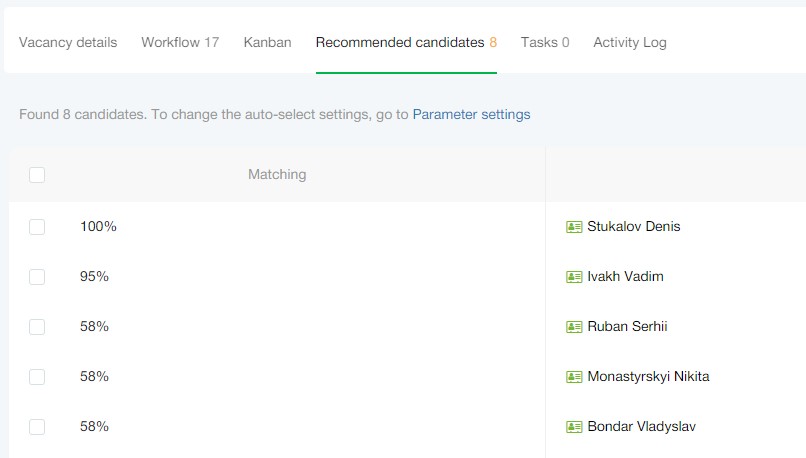
The created vacancy is added to the active ones and can be edited if necessary. The more precise the requirements for the candidate, the better. After all, CleverStaff has an auto-matching function. The system is able to automatically evaluate the data from the resume and compare it with the vacancy description, and based on this data, select the most relevant candidates. Thus, it significantly saves time on search and estimation.
If you have linked CleverStaff and your accounts on job portals, you can post a vacancy there in one click automatically, instead of wasting time on manual filling.
A public page is also generated for such a vacancy, through which the candidate can also send his or her resume to you for consideration – also in one click 🙂
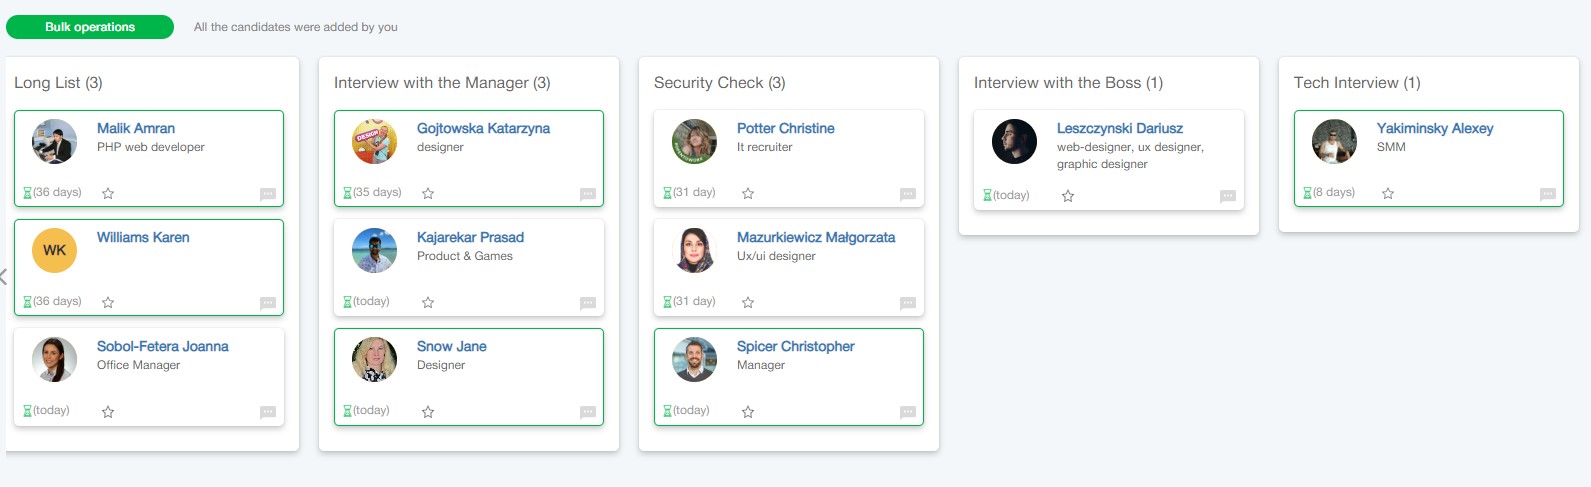
By the way, this year the developers have added a new type of candidate display in the vacancy, namely, in the form of a kanban board. Now candidates have “turned” into cards that contain all the important information. This allows you to manage candidates at the hiring stages more conveniently, including moving through the stages by simply holding down the cursor.
STEP 4. Hunt for candidates with passion
Move cheerfully to the Candidates section.
The system allows you to add new candidates both from the New Candidate tab and using additional menus on the Our Database tab. You can add them one by one by filling out profiles manually, import resumes from email, or import a large number of candidates from specially prepared excel sheets in a massive way.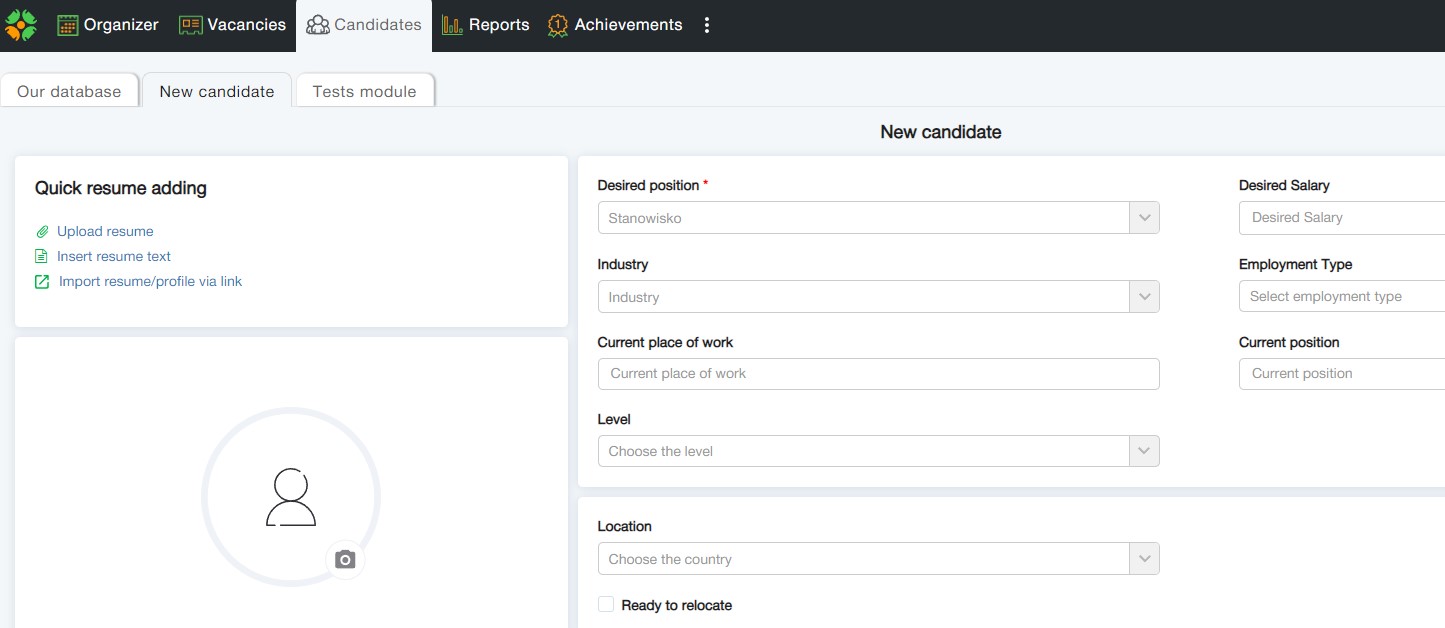
And of course, with the help of a plugin installed on Chrome and Edge, you can download resumes from DOU and Djinni portals, as well as LinkedIn.
Among the latest updates is integration with the well-known HR system BambooHR, which allows you to easily transfer hired candidates to your BambooHR account by clicking the appropriate button on the candidate’s profile.
You can also open messengers by clicking on the corresponding field in the candidate’s contacts (WhatsApp, Telegram, Viber, Skype).
When creating a database, you can either immediately associate a particular candidate with a specific vacancy or simply add them to the database by adding to it.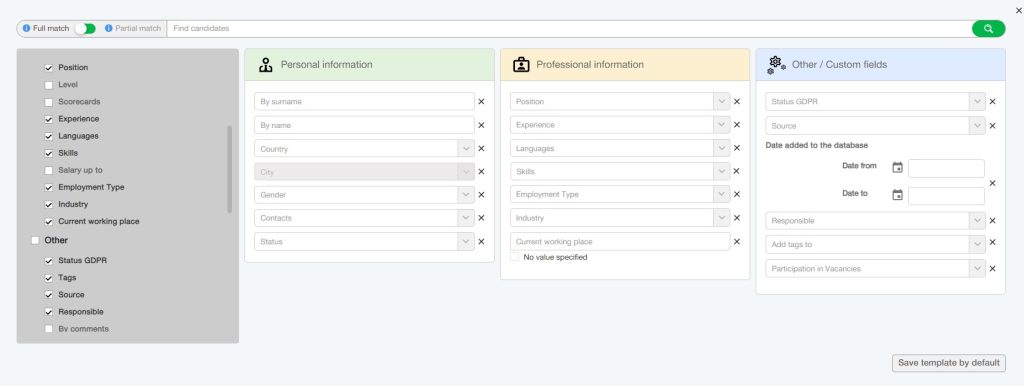
The database can be searched by words and their parts; there is also an advanced search. In plain language, the candidate simply has no chance to hide from you and say “it is not him” ☺ Absolutely.
STEP 5. Organize your work quickly and easily
The Organizer section displays your daily tasks and calendar.

The My Tasks section is your diary, where you record tasks and receive reminders about changes in vacancies.
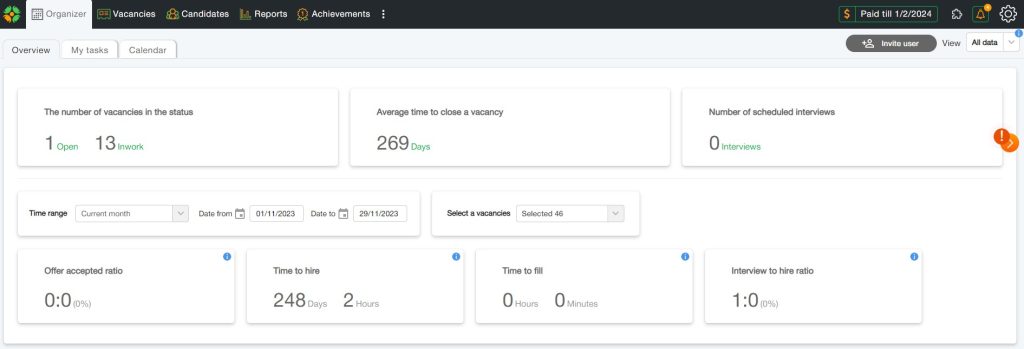
One of the most recent interesting updates in the system is the dashboard of key performance indicators in the “Indicators Review” tab. It shows the number of vacancies in the “Open” and “In progress” statuses, the average closing time, the number of scheduled interviews, etc.
The Calendar section allows you to integrate your Google or Outlook calendar with CleverStaff. So, without leaving the system, you can see your tasks for the whole day. And besides, when you integrate, all tasks from CleverStaff are added to the corresponding calendar. Everything for your convenience!

STEP 6. Free your brain from unnecessary stuff
If you compare the Reports section to a person, it would probably look like a PhD in glasses who loves analytics and does it for you.
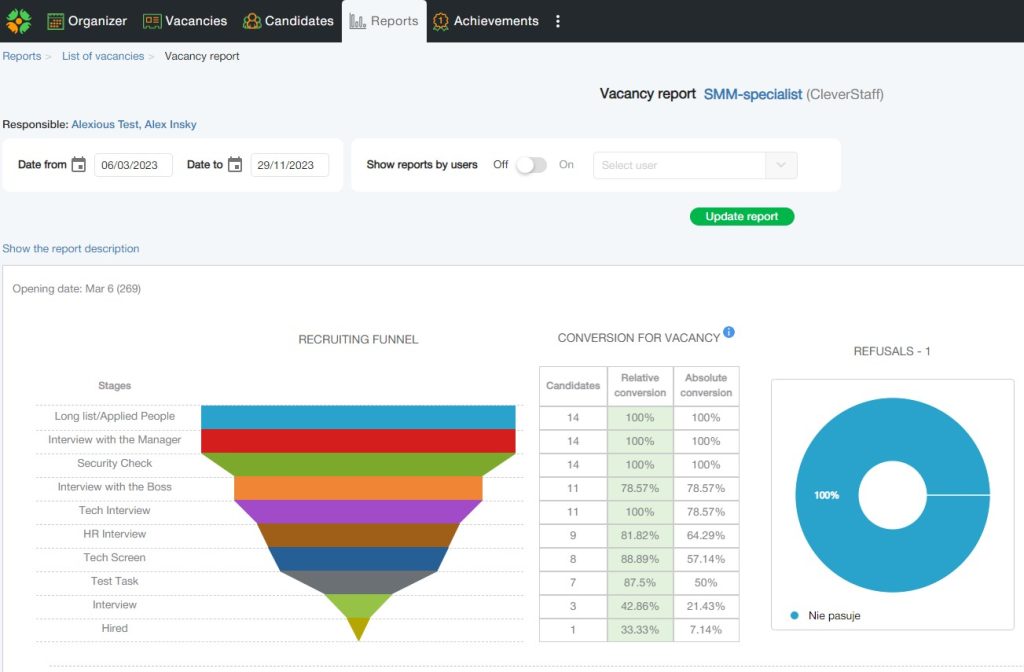
The system offers 5 ready-made reports: “Funnel and Vacancies Report”, “Candidates Sources”, “User Activity”, “User Statistics”, and “Pipeline Report”. You can also create your own report according to the required parameters and download reports via API.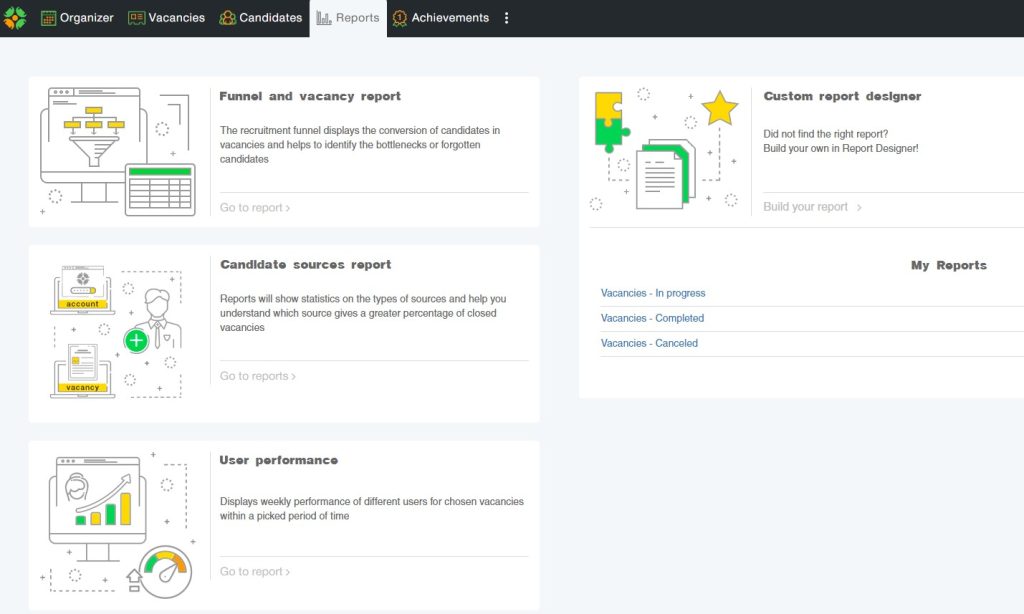
We have to admit that this section is very popular with leads and HRDs who want to see what is actually happening with hiring and what their department is doing.
STEP 7. Work on improving your self-esteem and more!
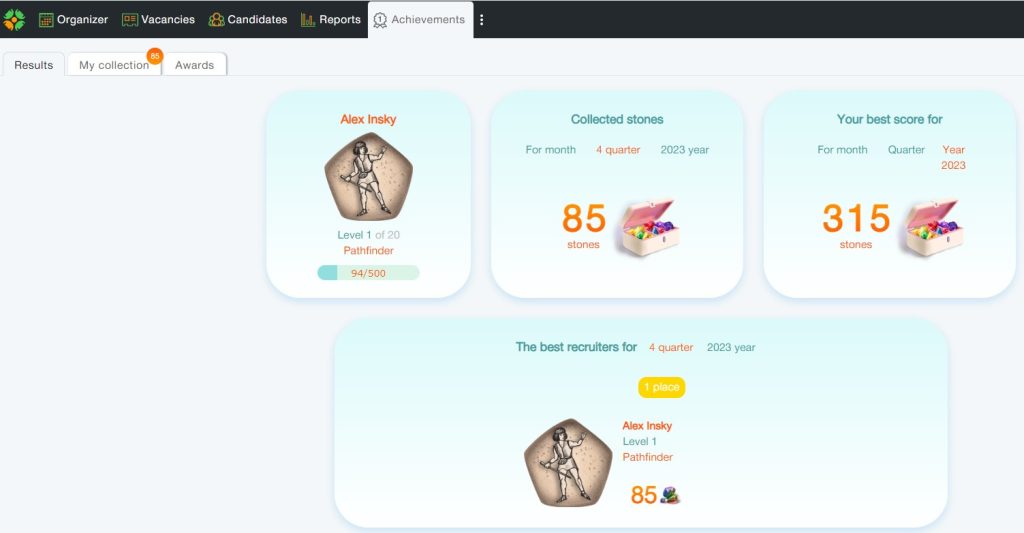 The “Achievements” tab is the place where, once you visit, you will look at regularly. After all, all your successes and achievements are recorded here, even the smallest ones, even those that you do not consider as such. Everything is there! Everything is digitized by the system. Day after day, you will notice them with pleasure, accumulate them and be proud of yourself. Your colleagues and management, by the way, will be too.
 Your daily progress is carefully monitored in the system, and you gradually move from level to level, grow, receive encouragement, congratulations and awards.
In addition to the powerful emotional impact, gamification in CleverStaff makes work 18.6% more efficient, and you save up to 2.5 working months per year. This fact is confirmed by our research.
So, we invite you to enjoy all the benefits of CleverStaff! If any points are not clear enough – our client managers are always on the outlook, just ask here: bizdev@cleverstaff.net
We wish you a pleasant and productive work!